【SwiftUI实战】一个简单的天气显示界面
Kwok 发表于:2021-03-26 17:26:32 点击:87 评论: 0
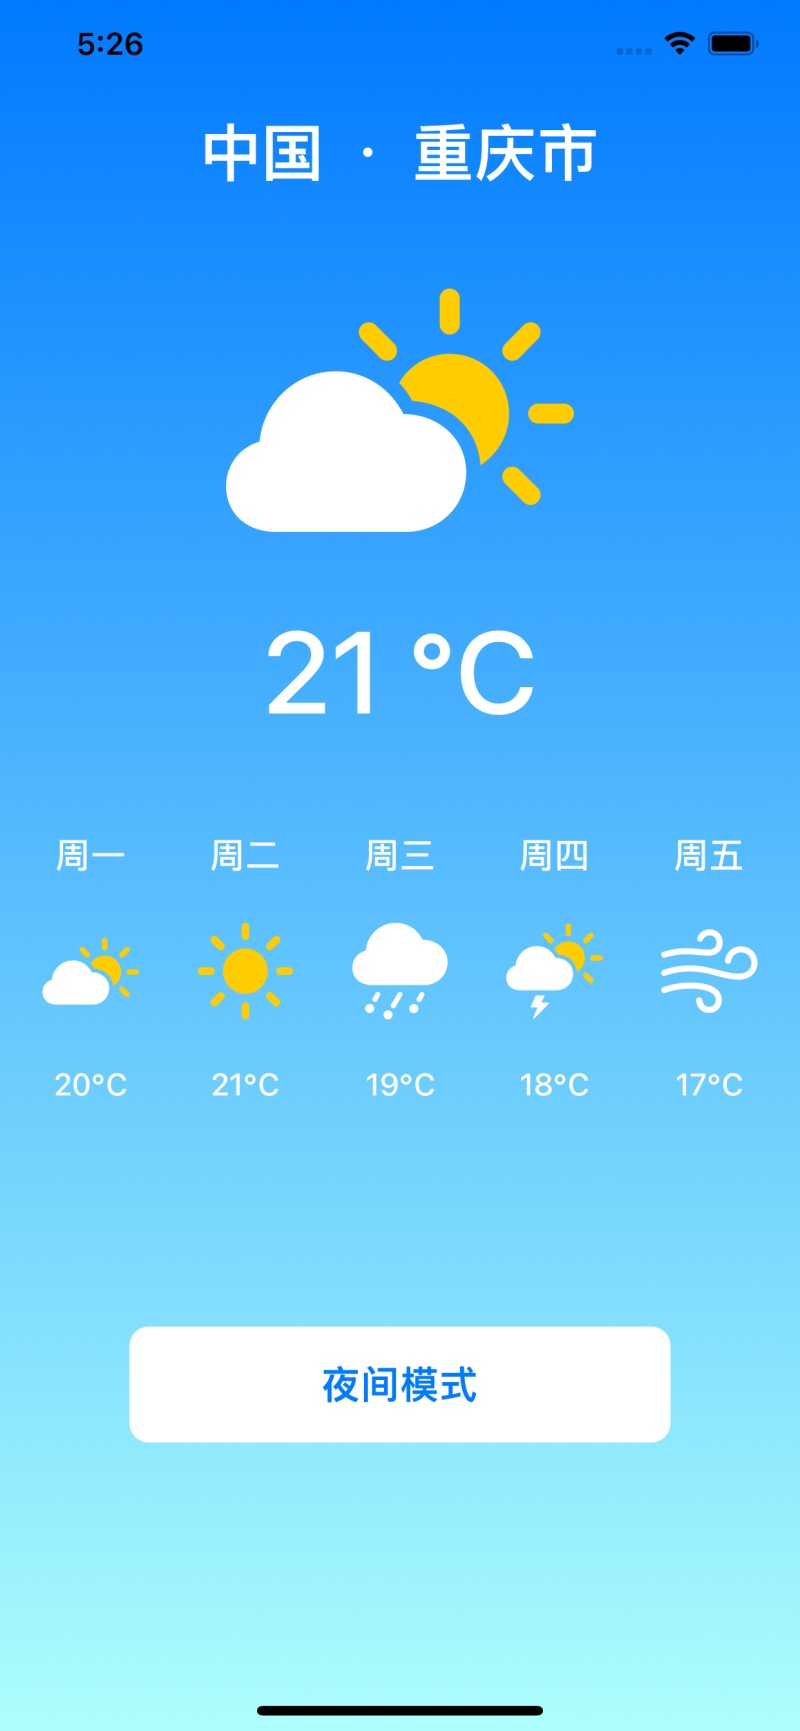
本示例的主要知识点是利用ZStack重叠特点做一个代码渐变背影。
先看示例图:
1、白天模式
2、夜间模式

1、View的代码如下:
import SwiftUI
struct ContentView: View {
    @ObservedObject var WeartherDay:Data = Data(
        [
            WeartherData(week: "周一", weartherICO: "cloud.sun.fill", temperature: 20, id: 1),
            WeartherData(week: "周二", weartherICO: "sun.max.fill", temperature: 21, id: 2),
            WeartherData(week: "周三", weartherICO: "cloud.hail.fill", temperature: 19, id: 3),
            WeartherData(week: "周四", weartherICO: "cloud.sun.bolt.fill", temperature: 18, id: 4),
            WeartherData(week: "周五", weartherICO: "wind", temperature: 17, id: 5)
        ])
   @State var isNight:Bool = false
    var body: some View {
        ZStack{
         BodyBackgoundView(isNight: $isNight)//背影颜色
            VStack{
                CityTextView(cityName: "中国 ・ 重庆市")//城市名字
                VStack{
                    //城市天气视图
                    MainCityWeartherVie(imageName:"cloud.sun.fill",temperature: 21)
                }
                .padding(.bottom,40)
                HStack(spacing:30){
                    ForEach(WeartherDay.weartherData){ data in
                        WeartherDayView(dayOfWeek: data.week,
                                        imageName:data.weartherICO,
                                        temperature: data.temperature)
                    }
                }
                Spacer()
                Button(action: {
                    isNight.toggle()
                }) {
                    Text(isNight ? "白天模式" : "夜间模式")
                        .font(.system(size: 20,weight:.bold))
                        .foregroundColor(.blue)
                        .frame(width: 280, height: 60)
                        .background(Color.white)
                        .cornerRadius(10)
                }
                Spacer()
            }
        }
    }
}


struct WeartherDayView:View {
    var dayOfWeek:String
    var imageName:String
    var temperature:Int
    var body: some View{
        VStack{
            Text(dayOfWeek)
                .font(.system(size: 18, weight: .medium))
                .foregroundColor(.white)
            Image(systemName: imageName)
                .renderingMode(.original) //呈现方式(.原始),如果图标有颜色则显示
                .resizable() //布满
                .aspectRatio(contentMode: .fit) //按比缩放
                .frame(width: 50, height: 50)
                .padding(.vertical)
            Text("(temperature)℃")
                .font(.system(size: 16, weight: .medium))
                .foregroundColor(.white)
        }
    }
}


//城市主天气视图
struct MainCityWeartherVie:View {
    var imageName:String
    var temperature:Int
    var body: some View{
        VStack(spacing:10) {
            Image(systemName: imageName)
                .renderingMode(.original) //呈现方式(.原始),如果图标有颜色则显示
                .resizable() //布满
                .aspectRatio(contentMode: .fit) //按比缩放
                .frame(width: 180, height: 180)
            Text("(temperature) ℃")
                .font(.system(size: 60, weight: .medium))
                .foregroundColor(.white)
        }

    }
}

//页面背影设置
struct BodyBackgoundView:View {
    @Binding var isNight:Bool
    var body: some View{
        //LinearGradient渐变沿着一个方向渐变颜色,起始点和结束点为数组可定义多个颜色
        LinearGradient(gradient: Gradient(colors: [isNight ? .black : .blue, isNight ? .gray : Color("lightBlue")]), startPoint: .top, endPoint: .bottom) //lightBlue 是自己在Assets里调用的颜色。R:0.678 G:1 B:0.988
            .edgesIgnoringSafeArea(.all)//更改视图的建议区域,以扩展到屏幕的安全区域之外。
            .animation(.easeInOut(duration: 1.0))
            .id(isNight ? ".black" : ".blue")//ID改变才能触发过度效果
            .transition(rollTransition)//应用自定义过度
    }
//自己定义一个向上滚动的过度效果
    var rollTransition:AnyTransition{
        AnyTransition.asymmetric(
            insertion: .offset(x: 0, y: 9000),
            removal: .offset(x: 0, y: -9000)
        )
    }
}
//城市名字
struct CityTextView:View {
    var cityName:String
    var body: some View{
        Text(cityName)
            //设置文字属性
            .font(.system(size: 32, weight: .bold, design: .default))
            .foregroundColor(.white)
            .padding()
    }
}


struct ContentView_Previews: PreviewProvider {
    static var previews: some View {
        ContentView()
    }
}
2、Model的代码:
import Foundation
struct WeartherData:Identifiable {
    var week:String
    var weartherICO:String
    var temperature:Int
    var id:Int
}
3、ViewModel的代码:
import Foundation
class Data : ObservableObject{
   @Published var weartherData:[WeartherData]

    init(_ data:[WeartherData]) {
        self.weartherData = []
        for item in data{
            self.weartherData.append(WeartherData(week: item.week, weartherICO: item.weartherICO, temperature: item.temperature, id: item.id))
        }
    }
}除非注明,网络人的文章均为原创,转载请以链接形式标明本文地址:https://www.55mx.com/post/110

本站推荐阅读


热门点击文章
- 【Laravel经验】强大的Model应该这样用阅读:515 评论:0
- 各大门户网站网页变灰的代码阅读:514 评论:0
- 在城市体面的“流浪”指北阅读:493 评论:0
- 利用程序计算小学3年级的奥数题 2,4,5,7,11,13,23,25,( ),( )阅读:457 评论:0
- mysql 14001错误 could not start the service mysql阅读:437 评论:0
- 【Laravel实战】Ajax验证captcha 验证码阅读:435 评论:0
- 家庭云(NAS)最简单的组建技术阅读:424 评论:1
- 测试阿里云服务器的1M带宽能支持多少人在线阅读:418 评论:0
- “无奸不商”的原来意思“无尖不商”,可现实却是“无贱不商”阅读:418 评论:0
- 通过指令3秒查出你的男(女)朋友用手机在做什么阅读:418 评论:0
- 一个可以防止图片木马的PHP上传类阅读:418 评论:0
- PHP中实用的常量和系统全局变量阅读:417 评论:0
- 通过Kcptun给Shadowsocks加速,能跑满你的带宽阅读:417 评论:0
- 让你的网站每天更新快照并实时收录并不难!阅读:415 评论:0
- 一个比较好用的JS原生封装Ajax.js,使用方法与jQuery一样阅读:404 评论:0
《【SwiftUI实战】一个简单的天气显示界面》的网友评论(0)